The Perfect Recipe for Easy Fresh Strawberry Scones
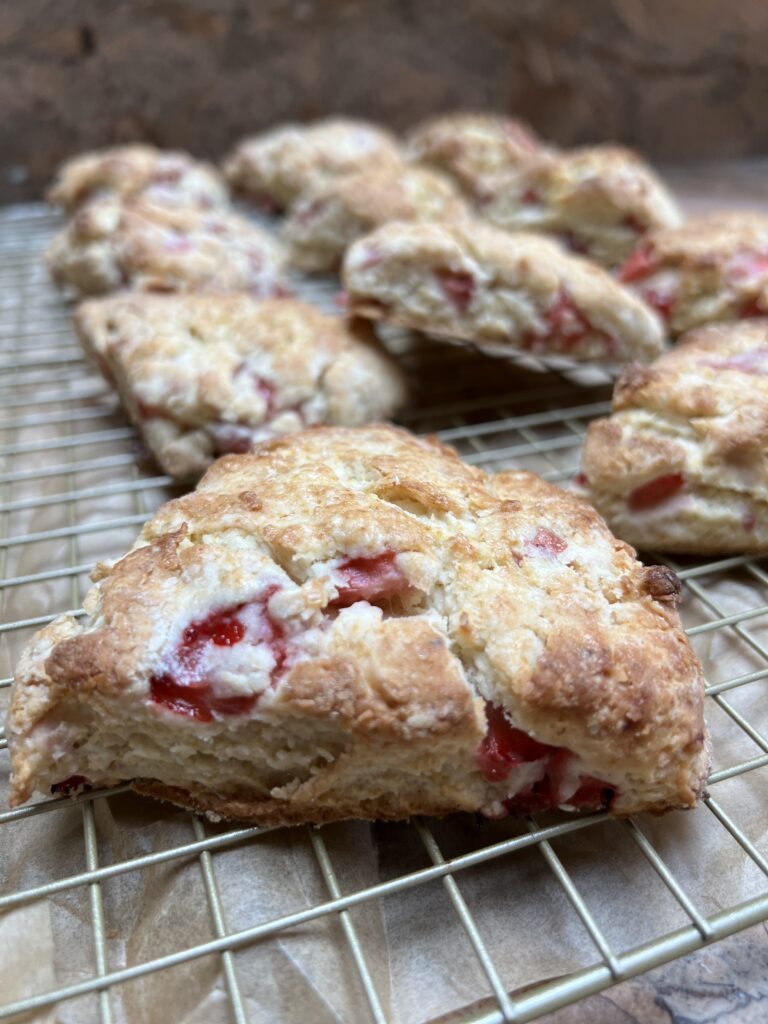
Dare I say, this easy strawberry scones recipe is the flakiest, butteriest (is that a word…..because it should be!) scone of all time. The fresh strawberries become gorgeous and jam like, and it breaks apart in the most beautiful and perfect way. The heavy cream, brushed on top before baking gives them an extra golden brown exterior, and the Demerara sugar provides a really delightful crunch.
These are perfect to bring to a friend’s house for brunch, serve for breakfast, snack on in the afternoon with a cup of tea, afterschool snacks, welcome a new neighbor to the ‘hood or for one of the thousand activities at your kid’s school that request a baked treat. If you’ve tried the Vanilla Bean and Cardamom Scones with Manuka Honey Glaze, Cinnamon Chocolate Scone Buns, or Toasted Coconut Lemon Scones, you’ll love these fresh strawberry scones.
Now, before you say “But Lisa, I don’t bake!”, trust me when I tell you, these are so easy to make! Once you make them, you’ll want to make them all the time! I’ll walk you through some easy steps and before you know it you’ll be sitting down to a plate full of warm, buttery, flakey strawberry scones. The recipe starts with a simple cream scone recipe and we take a turn directly into strawberry fields.
Speaking of strawberry fields, after the longest Winter on record in Washington, I’m so excited Summer is here and it’s finally strawberry season!! We haven’t gone strawberry picking yet, but now that we’re empty nesters, we’ll just live off the memories of all the visits made, and strawberries picked, when our kids were little. Even though we haven’t gone strawberry picking in years, every summer, as soon as my daughter arrives home from college, of all my scone recipes, these are the ones she requests for her first breakfast at home.
How to Make Strawberry Scones:
- Place all your dry ingredients in a large mixing bowl.
- Whisk flour and dry ingredients together.
- Add the frozen butter to the flour mixture.
- With your hands, gently pinch the dough together. A great way to know the dough is ready is if it starts to hold together. Take a small piece in your hand, press gently, and if it holds together you’re ready for the next step.
- Use a spatula to create a well and add the cut ripe strawberries. Gently stir to incorporate the strawberries.
- Stir in the heavy cream and vanilla. Do this gently, and stir only until the cream is incorporated.
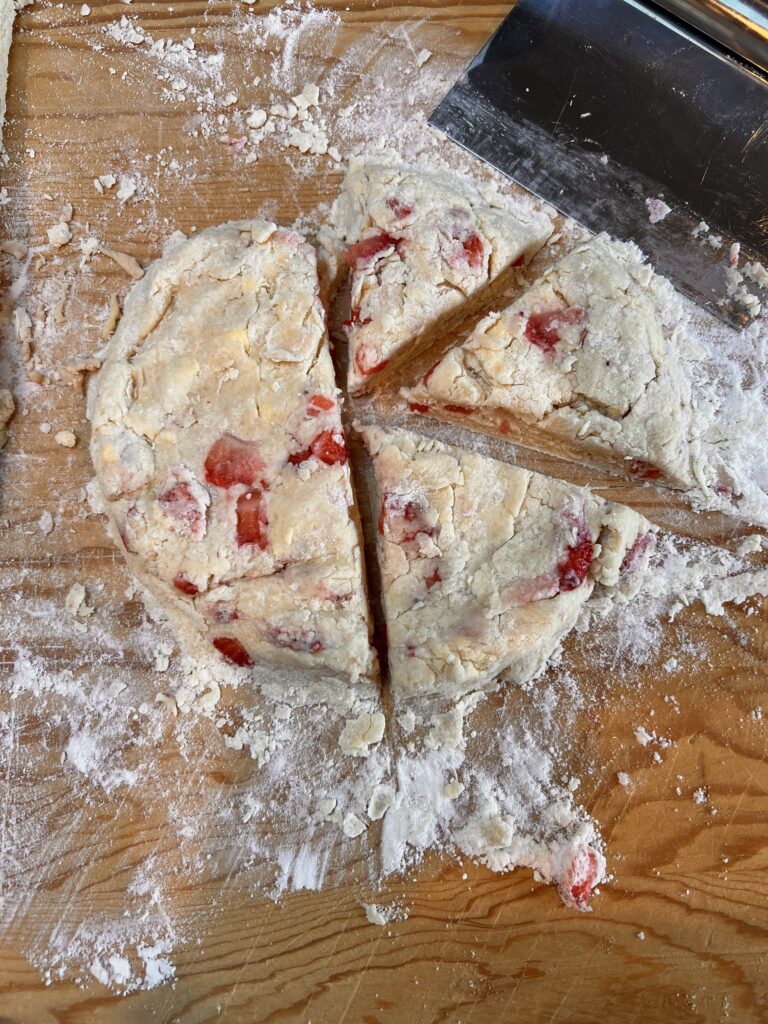
- Turn out dough onto a lightly floured surface, and shape/pat it into a large round disk. If you have one, a dough scraper is really useful to gather up all the bits of dough.
8. Cut 8 wedges and place on a cooking sheet.
9. Brush each wedge with whipping cream and sprinkle with Demerara, turbinado sugar, or any brand of flakey sugar.
10. Bake at 425 or until completely cooked through. The bottoms should be lightly browned and you should be able to easily insert a toothpick and have it come out completely clean.
11. Now for the hard part – cool on a rack before serving. At this point I’m usually shooing my family out of the kitchen, or I risk all the scones disappearing in one fell swoop!
Tips on how to get super flakey scones:
Freeze your butter. If you’re using the food processor method, cube the butter first and place it in a bowl in your freezer for about 15 minutes. If you’re using the box grater method, place the grated butter in a bowl in your freezer for about 15 minutes.
There are two ways to incorporate the butter for flakey scones:
1. Place dry ingredients in a food processor, add the butter, and pulse until the butter becomes little pebbles.
OR
2. Use a box grater to grate the butter. I like to place a sheet of parchment paper under the box grater to catch the butter. I prefer this way because there’s less cleanup, but either way will result in super flakey scones.
I would be remiss if I didn’t mention you can also use a pastry cutter or pastry blender. It’s not my first choice because I can never get the butter to incorporate properly. But if you love your pastry cutter, by all means whip it out and use it.
Don’t overmix the scone dough. When you’re stirring in the cream, and when you’re shaping the dough, don’t spend a ton of time. The more you handle the dough, especially when you’re shaping it, the more the dough (and the butter) will warm with the heat of your hands. In order to get flakey scones, you want the butter and dough to stay as cold as possible. As the scones bake, the heat from the oven evenly disperses the fat in the butter into the dough. This creates steam which results in the flaky layers of the scones. If the butter melts before you bake the scones, they’ll spread out and become dense. Not ideal.
Keep all your ingredients cold — the butter should be frozen for best results, and the egg and cream should come straight out of the refrigerator.
What is the secret to a good scone?
Here are 3 ways to ensure you achieve the perfect scones:
Freeze the butter. I know I sound like a broken record at this point, but this step is important. Cold butter is one of the best ways to the perfect scone.
Chill the dough before baking. After you form the wedges, place them on a parchment-lined baking sheet and place in your refrigerator for 20 minutes.
Use full fat whipping cream. What I’ve learned in baking is to achieve the ultimate in flakiness, whole fat is important. This isn’t the time to skimp and use 2% or almond milk.
What to Avoid When Making Scones:
Avoid overmixing. The more you work the dough, the more you stir, and the longer you spend shaping, the tougher the dough will become. For tender scones you want the dough to look “shaggy.” It doesn’t need to perfectly hold its shape.
Avoid substituting low fat cream. The high fat is needed for flakey scones.
Not chilling the dough before baking. I can’t stress enough the importance of using cold ingredients: the cream and egg need to be cold and the butter needs to be frozen. To take it a step further, put your mixing bowl in the fridge to get it nice and cold, too.
The difference between British Scones and American-Style Scones:
Scones originated in the British Isles in the 16th Century. Like most recipes, when scones came to America, they became similar to quick breads based on the availability of ingredients.
British scones tend to be round and flatter, while American scones tend to be triangle-shaped and taller.
British scones tend to have a very simple flavor profile, while American scones tend to be filled with fresh fruit (like blueberry scones), dried fruit, or come in different flavors like chocolate or pumpkin.
Because of their simple flavor, British scones tend to be topped with lemon curd, clotted cream (my personal favorite) or jam. American scones are usually drizzled with a sugary glaze, so jam or other toppings isn’t usually added.
How long will these strawberry scones last?
In my house, they’re usually gone in a day. Store them in your fridge in an airtight container and they should last 1-3 days. If you make them ahead, warm them in a 300 degree oven before serving.
Next time you’re at your local coffee shop and tempted to buy one of their scones, resist the urge and make these instead! These are the best homemade scones and the addition of sweet strawberries takes them over the top!!
I can’t wait to for you to make these! These would also be incredible with raspberries, blueberries or pears! Go have fun with the recipe and don’t forget to leave a comment and let me know how they turn out!